Plan Your Tile Order with Confidence Firstly
Tired of guessing how many tiles you need? Our Smart Flooring Area Calculator makes it easy to plan like a pro. Unlike basic estimators, this flooring area calculator factors in room size, multiple spaces, layout patterns, and material waste—so you get accurate, real-world results, not just rough numbers.
Step 1: Enter Your Room Dimensions
Step 2: Add Multiple Rooms if Needed
Step 3: Choose a Layout Pattern, learn how to choice a layout pattern,
Step 4: Adjust for Extra Material Waste
Step 5: See Your Recommended Quantity
✅ Pre-designed Herringbone & Grid Options
We’ve already designed tile layouts like herringbone and square grid styles—so you can create stunning patterns without extra cuts or waste.These styles work perfectly with our flooring area calculator.
✅ Large-Format Tiles for Large Spaces
Working with big rooms? Choose our 24”×24” (600×600mm) or 24”×48” (600×1200mm) tiles. Fewer grout lines, cleaner look, and less waste from cuts —perfect for optimizing results in the flooring area calculator.
Need Help with Flooring Math?
Learn how layout and waste affect your order, and what each part of the flooring area calculator’s result means.
How to Choice a Layout Pattern

Straight Lay
Straight Lay or Offset Lay means that Tiles are aligned in perfect rows and columns. Most efficient layout. Minimal cutting, ideal for quick installs.Good for first-timers.

Brick Lay
Bricky Lays is Classic and relaxed. Tiles are offset like bricks. Popular and subtle, but requires slightly more tile than straight lay.
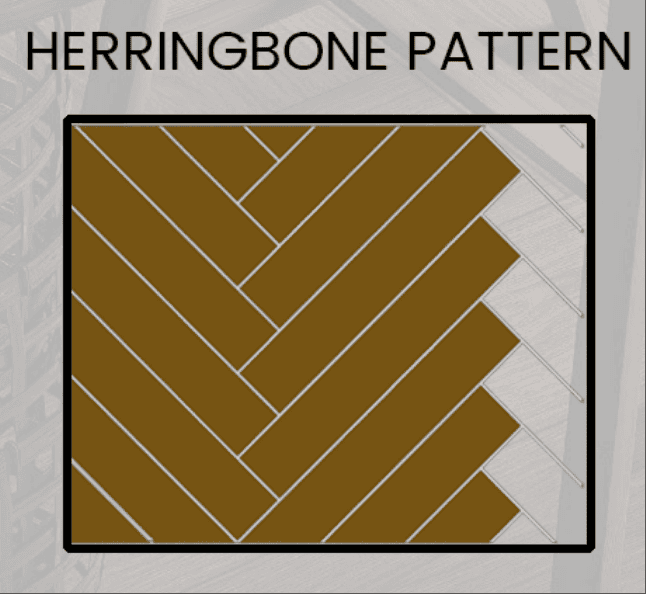
Herringbone
Zigzag pattern that creates a bold, elegant floor. Requires extra cuts and skill — best used in feature areas like foyers or accent walls.
Start from here: Enter Your Room Dimensions
Choose units, input length and width, or enter total square footage directly. Real-time conversion supported.
Need Help with Flooring Math?
Learn how layout and waste affect your order, and what each part of the result means.
Because each tile is cut at an angle to create the V-shaped zigzag. That means more cuts, more waste, and more room for error — especially near walls and corners.
Not much. It needs more attention to alignment and edge trimming, but it’s still a beginner-friendly layout — even for DIY installs.
Yes — always. You’ll need to cut for edges, avoid cracked tiles, and handle layout shifts. We recommend at least 5–10% extra for all projects.
A straight stack bond (grid pattern) uses the least tile and is fastest to install. If you’re optimizing for budget and speed, it’s the best option.
No. The layout is visual. Performance depends on the material, not the pattern. Feel free to choose what looks best for your space.
Highly recommended. These layouts involve precision cuts and alignments that are difficult for beginners. It’s worth the cost if you want a flawless finish.
You can, but future batches may vary slightly in color or grain. We recommend ordering enough now — or ask us for help calculating it right.
Absolutely. Saving 1–2 boxes for future touch-ups or replacements is smart — especially if the product is seasonal or style-specific.
